


At this moment, at the peak of the year as I see it – just before the clocks fall back an hour and the days become more dark than light – I often have a feeling of being poised at the top of a slide that swoops down gently into the ‘Festival of Sweet Things’ that are the final months of the calendar year. I imagine that in Willy Wonka’s Chocolate Factory this slide would actually exist, and it would be made out of the stuff of peppermint candy canes – fabulous and hypnotic with their swirling red and white stripes. To set you on your sweet, slidey way we offer a recipe for caramel apples, that will tingle your tastebuds in readiness for the festive season.

Our new limited edition Christmas Mug and Bowl - fairgrounds, carousels and all the fun of the fair
‘Witch’ Apple to cloak in caramel?
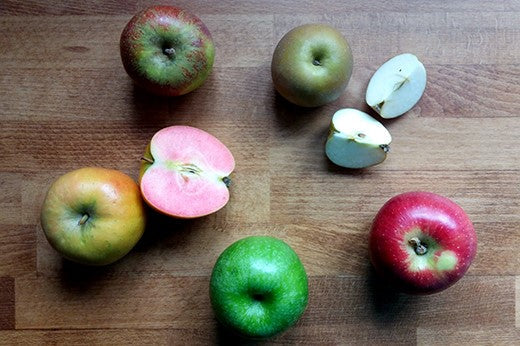
Traditionally, crisp and tart Granny Smith apples are used for caramel or candy apples. However, at this time of year you may find many other interesting heritage varieties in independent grocers and local farmer’s markets that would be well worth a try for the fantastic breadth they offer to the spectrum of flavour and crispness. And, if you manage to come across an Ardcairn Russet – with a taste that hints of banana - you can upcycle this recipe into ‘banoffee apples’.
Homemade Caramel Apples Recipe
To reach a mix similar to this caramel recipe, it is possible to melt down soft caramels with double cream. However, if you have the time, and also ideally a candy thermometer, the recipe below will save you unwrapping individual sweets and all the packaging that that brings, not to mention the pleasure in seeing chemistry at work as the sauce bubbles and transforms.
You will need:
8 tart apples – I used a collection of Granny Smith, Braeburn, Jazz, Russet, and extraordinarily pink-fleshed Kissabel apples – picked out for their small/medium size and even shape.
8 wooden chopsticks or BBQ skewers
1 cup unsalted butter
2 cups soft brown sugar
1 cup light corn syrup or golden syrup
1 can (around 400ml) sweetened condensed milk
2 tsp vanilla extract
Toppings - chopped toasted nuts (I used toasted chopped hazelnuts with a sprinkling of sea salt), sea salt flakes, or, sprinkles of your choice (I used chocolate and multi-coloured sugar vermicelli)
Method:
- Bring a large saucepan of water to the boil. Remove any stalks and one at a time dip each apple in the boiling water for a few seconds. Then take it out and dry it with a paper towel to remove any wax from the skin. Leave to cool.
- While the apples are cooling line a baking sheet with parchment/greaseproof paper and prepare your toppings on plates so everything is to hand when the caramel sauce is ready.
- Insert firmly into the top of each apple whatever you’re going to use as a handle – wooden chopsticks or BBQ skewers work well because of their length.
- Over a medium heat gently bring the butter, brown sugar, syrup and condensed milk to temperature, stirring gently and constantly. You’re aiming for 113ºC/235ºF. Depending on your hob the time this takes will vary, somewhere between 15 - 30 minutes. You can test the caramel by dropping a small blob of syrup from the tip of a teaspoon into a glass of cold water. If it’s ready it should firm up into a ball in the water.
- When the sauce is up to temperature remove the caramel mixture from the heat and stir in the vanilla extract then leave to cool and thicken for about 15 minutes or so. If it still seems too runny leave it a bit longer. The caramel will stick better to the apple if cooled a little.
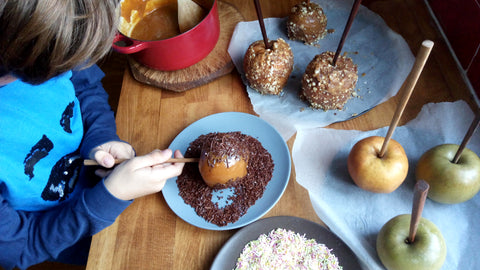
- Gently twist an apple into the caramel sauce to coat the fruit. You might need to tip the pan to get the depth to cover the whole fruit. Let any excess drip back into the pan then lightly roll it in the topping you’ve chosen before placing on the parchment to cool further. Repeat with the remaining apples. The caramel will set in about 45 minutes, (if you can wait that long).
- If you find the caramel has slipped down the sides while cooling, it can be trained back into place with a flat knife. Any that are left over or spare sauce will keep in an airtight container for a few days in the fridge.

PLEASE NOTE: as tempting as it is, remember NOT to lick the spoon or dip your fingers into the HOT sauce, especially if you’re making these with kids.
Enjoy the sweet ride and Happy Halloween!
Susan Mosse